The following article is reposted on LearningToGo.info with author’s permission. Thanks Bryan!
Originally posted on eLearningArt.com | March 19, 2018 by Bryan Jones
How to Repurpose Content in under 1 hour
Goal: Repurpose content for a blog post, quote images, and a video
Time required: 60 minutes (+/- 30 minutes)
Overview
The purpose of this quick start guide is to move from the #8 trend of “science-based learning” to action.
Brain science supports the idea that content needs to be repeated to open and widen multiple neuropathways to the same information. .
In fact, it’s the strategy I use as a marketer to reach my audience through different media.
So I’m going to walk you through a repurposing strategy that allows you to improve, expand, and repurpose content quickly.
In the next hour, here’s what you’re going to accomplish:
0: Learn the basics of science-based learning
1: Evaluate your existing content
2: Expand your content into an expert roundup
3: Strategize overlapping asset development
4: Create a highlight quote
5: Create image quotes
6: Create a video in PowerPoint
7: Create a blog post
8: Plan for training delivery
9: Identify other repurposing opportunities
And, of course, don’t forget that I’m giving away 4 brain-science books and 4 evidence based practice books as part the the $12,180 eLearning Givewaway
Now… on with the repurposing tutorial
0: Learn the basics of science-based learning
If you want learn the basics of science based learning, check out this post:
Science-based Learning Resource Article
In the post, you’ll see:
- An interview about Science-based learning with Margie Meacham (aka “The Brain Lady)
- Additional science-based resources
In the tutorial below, we’re incorporating the following concept from the interview with Margie:
The science of evolution and how brain developed.
In my interview with Margie she talked about the importance of “repeat, repeat, repeat” content to learning.
She discusses how our brains were designed to keep us alive, so we’re constantly distracted during learning as we subconsciously scan our environments to danger.
Repeating content through different media opens and widens neuropathways to make your content stick.
It’s something marketers have been doing for a long time, but learning professionals could be doing a better job…
So let’s start creating multiple formats of a single piece of content!
1: Evaluate your existing content
The best place to start is to look at where you’re at with existing content and see if there’s an opportunity to improve, expand, or repurpose your content.
Let’s assume that we’re going to start with the 50-100 word response we got from an internal expert (SME, manager, etc) we created in our microlearning tutorial. (Note: I have email scripts you can use to rip out some simple content in under an hour.)
The question may have gotten you a response like this:
“Having content pushed on us in the form of bullets and slides is clicking boring. What people care about isn’t information, but how to USE the information to do something. Flip eLearning content from “push” to “pull.” Create realistic scenarios that force learners to make decisions. Let the content be pulled through choices and feedback.”
Our plan with the microlearning content was to just distribute via email.
But let’s evaluate this in a larger context.
I really like how Aleyda Solice thinkgs about new content by first looking at her content repurposing workflow.
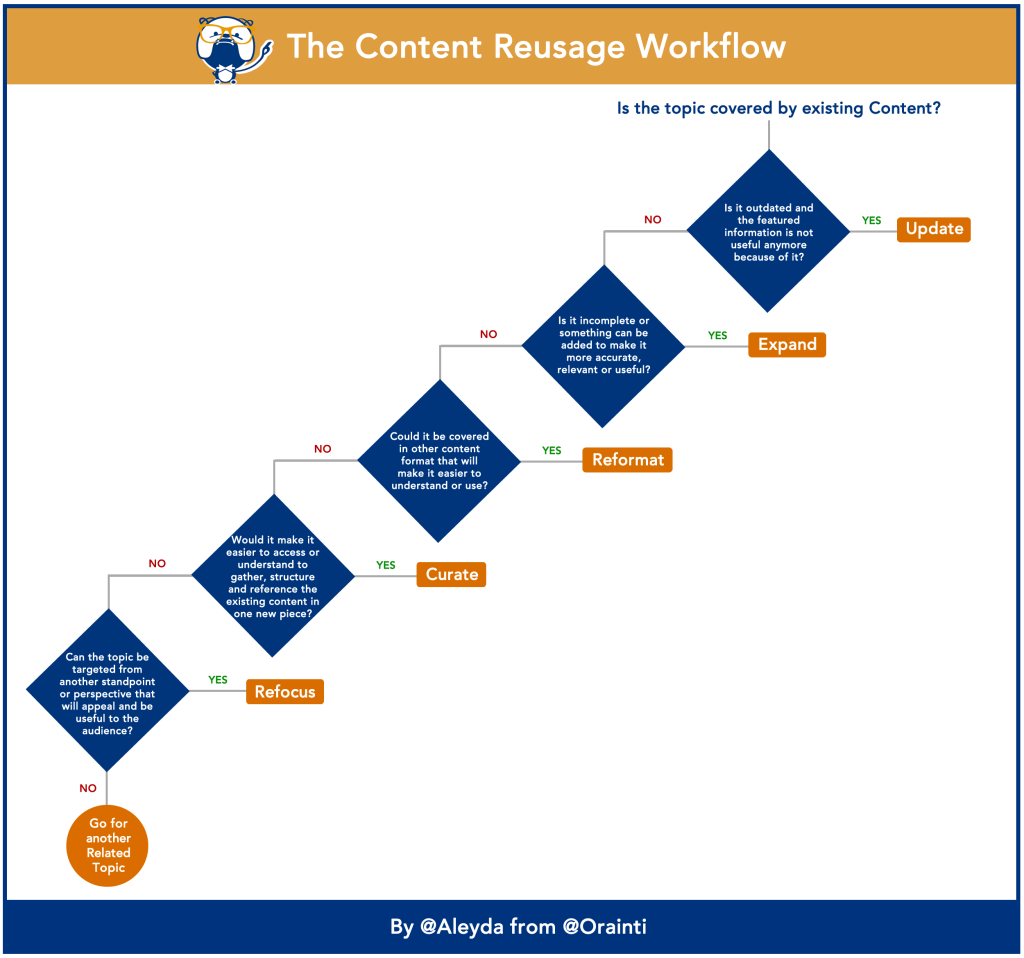
Starting in the upper right, here are my initial 2 thoughts…
Expand: From Aleyda’s 2nd decision point, I’d say this content is “incomplete.” I’d like to add more people’s responses to the post and make it an “expert roundup”
Reformat: And from Aleyda’s 3rd decision point, I think we can also reformat it into 3 additional media:
- Blog post: Roundup of multiple experts all answering a single question
- Image quotes: A highlight of what the expert said
- Video: A video that highlights what mulitple experts said
It could be a ton of things, like a job aid, knowledge base, etc, but let’s just go with the 3 above.
2: Expand your content into an expert roundup
If you only end up with 6-7 experts, no biggie. You certainly don’t need to go overboard and do the 50+ experts that I often get for my roundups. ?
10 is a nice round number that feels substantial.
Take that same ”Goldilocks” question template and email template from the microlearning tutorial.
Take an email like this and send it out to your 10 experts:
Hi [INSERT NAME],
I’m working on a quick lesson to help [new customer service reps] do their job better.
I’m hoping to get 5 minutes of your time to share your experience.
Can you please answer this one question for me?
What’s your #1 tip for [ACME customer service reps] to [handle an angry customer]?
Again, this shouldn’t take you more than 5 minutes. I only need a few sentences (50-100 words).
Please just reply to this email with your response and I’ll get it out to the team.
Thanks in advance for your time.
Best,
[Bryan]
Did you send it yet? Nice work! ?
3: Strategize overlapping asset development
As a marketer, I’m constantly looking for ways to repurpose content.
And not just repurpose, but cut down production time.
There’s no reason you can’t do this for training content as well.
If you look at the quote graphics in the eLearning trends article, you’ll notice that they’re a 16:9 aspect ratio.
Guess what aspect ratio a video is?… 16:9
It’s not a coincidence.
I created my quote images as 16:9 because I knew they’d fit perfectly into an overview video.
And that I could repurposed them easily into the blog post to make the content more visual.
In other articles, I’ve looked at the secondary content as twitter (rather than video). For those, I created the graphics in the optimal Twitter aspect ratio of 2:1.
4: Create a highlight quote
You’ll want to shorten the quote to about 100 characters. You can use this word count calculator to help with the length.
The full quote that I had above gets cut down to something like this:
“Create realistic scenarios that force decisions…Let content be pulled through choices and feedback.”
I try to get as few words as possible that still makes the point.
If you’re looking for examples of how to do it, check out some of my roundups that have quotes, here, here, or here.
5: Create image quotes
There are a zillion ways to format images quotes… Here are 3 designs I’ve used in the past:
Simple (text only):
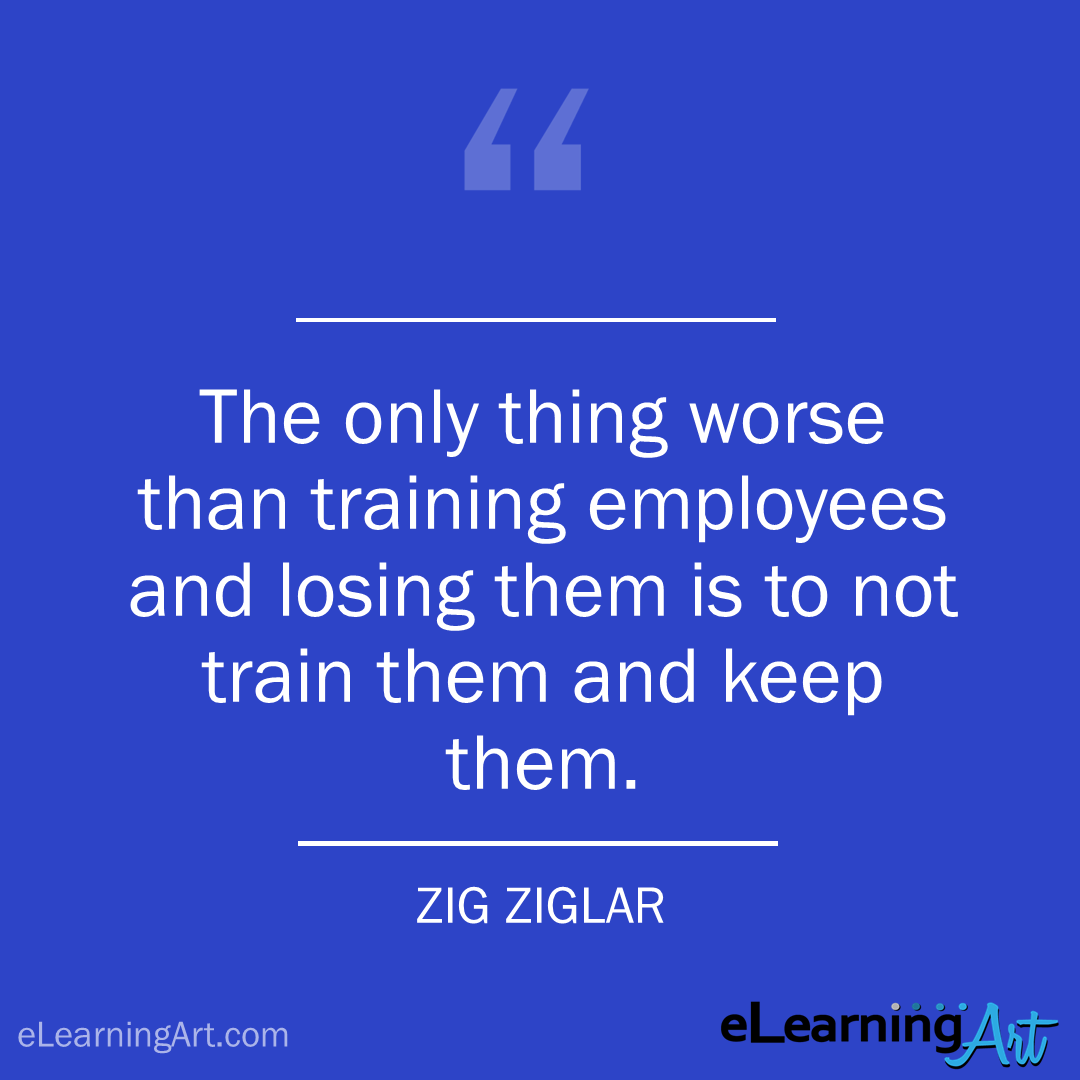
Side-by-side:
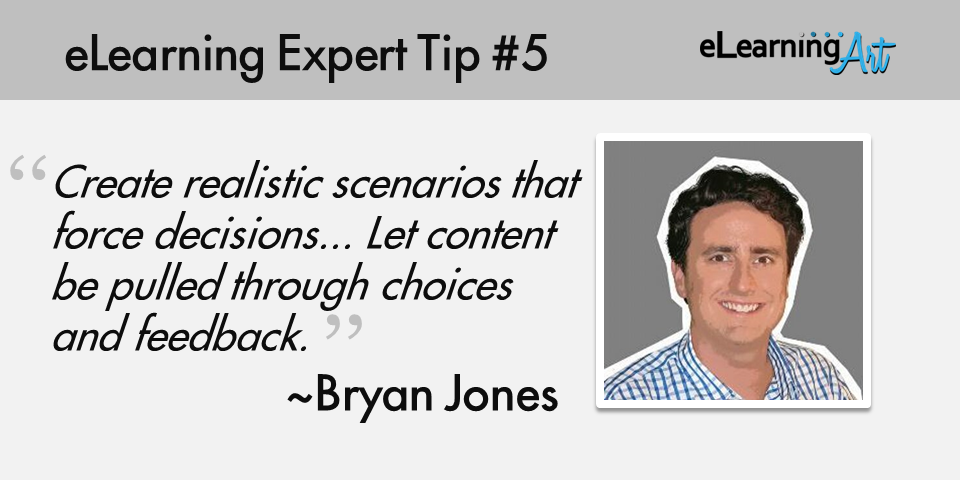
Overlay

Let’s just run with the overlay design. And make it even simpler, like this:
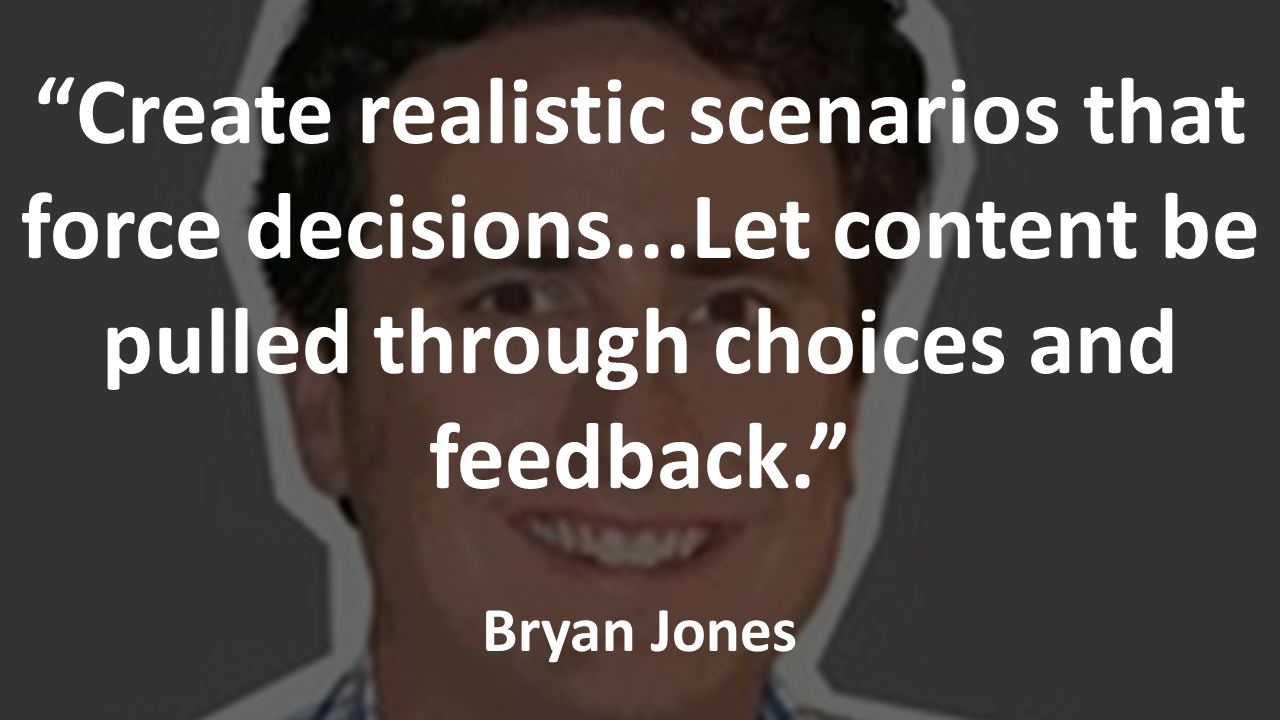
Here are the 3 reasons I like the overlay quotes:
- Shows the person who has the quote
- Images are usually available on LinkedIn
- It’s pretty easy to create
If you follow this blog, you know that I use PowerPoint as my main graphic design tool.
How to create a quote graphic in PowerPoint
1. Open PowerPoint
2. Verify slide size is “Widescreen (16:9)”
Via the “design” tab

3. On a blank slide, drop an image of the quote author and stretch it to cover the entire canvas
Ideally, it’s a resolution larger than the PowerPoint size of 1280 x 720px. If not, see my hack below
4. Add a semi-transparent rectangle over the image
Draw a rectangle over the image.
Right click, format shape
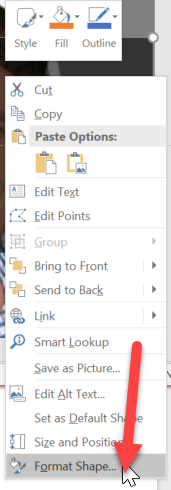
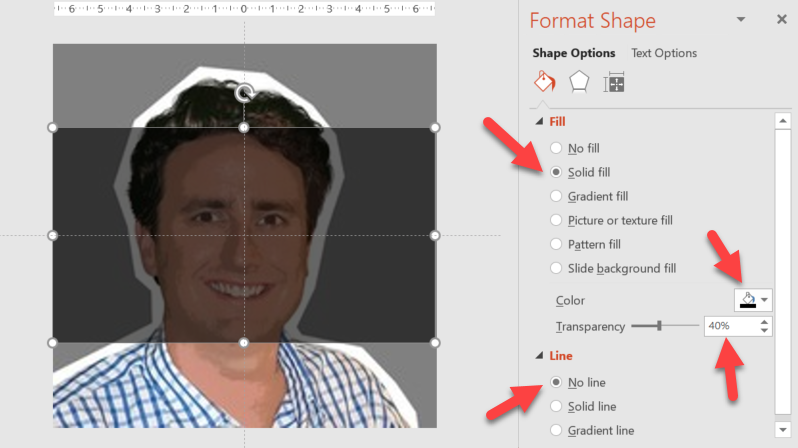
Then make the color black, transparency roughly 40% and no line
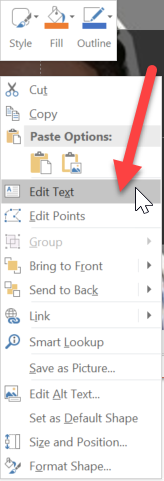
Right click the rectangle again and select “edit text”
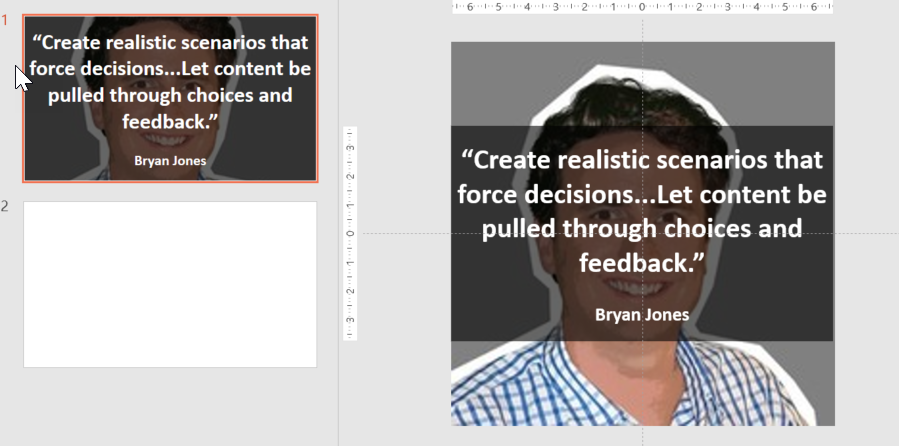
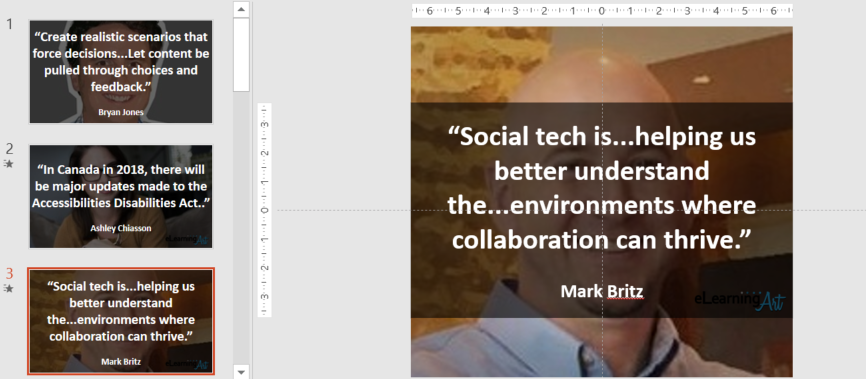
5. Insert and format your quote text
Include the quote text, the authors name, make sure the text is white, and size it up
Notice that the thumbnails on the left are the actual preview of the finished layout.
6. Repeat those steps for all 10 authors
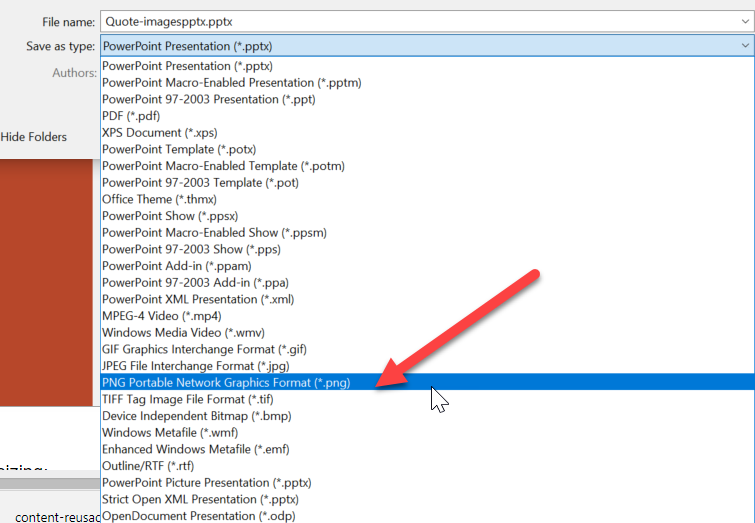
7. Save as image
File-Save-As, then select PNG from the dropdown
Save “all slides”

Then navigate to the folder and you’ll see you have all of the images!
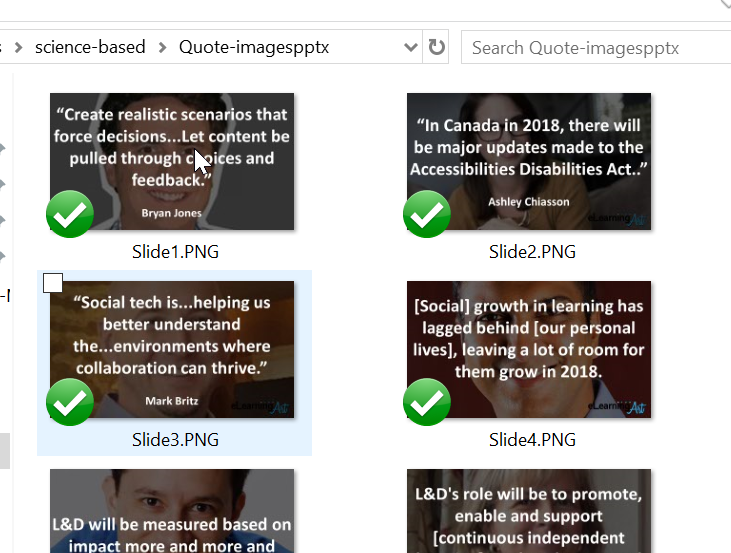
Boom! You now have your social images.
6: Create a video in PowerPoint
You might not know this, but you can use PowerPoint to create a video.
And since you already have the quotes in place, this will only take you about 2 minutes…
1. Select all 10 slides
The easiest way to do this is to click on any of the thumnails on the left, then do “CTRL+A” to select all.
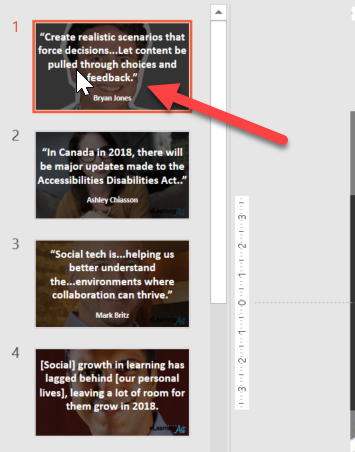
2. Set a simple transition for all slides
Click the “transitions” tab, then select “cut” (or other simple transition

3. Set the slides to advance automatically
From the “transitions” tab, with all slides still selected, check “After” in the “Advance slides” section and then set a time between 3-5 seconds (depending on the length of your quotes)
4. Save as mp4
Click “file-> save as” then select mp4 as the format
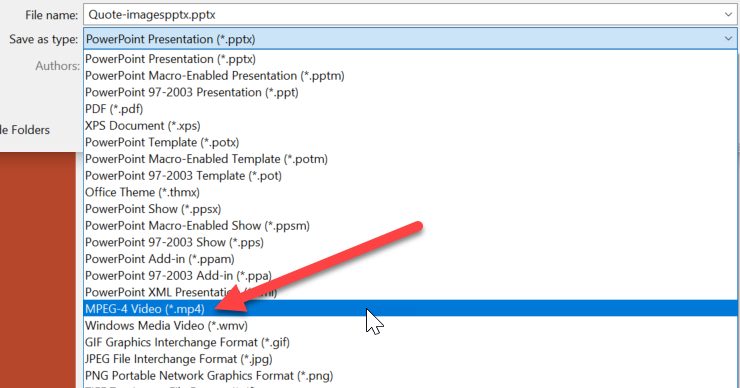
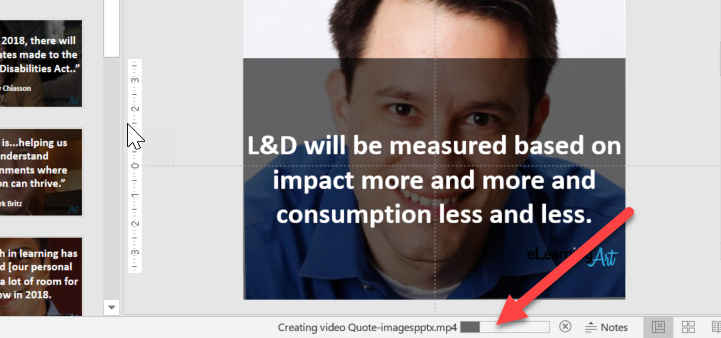
It might not seem like anything is happening, but you’ll see a status bar at the bottom of the screen:
5. Upload the mp4 to any video platform
Navigate to where you saved the file.
You can double click it to view the local copy
You can upload to almost any video platform, such as YouTube, Wistia, etc. for easier audience viewing
6. You’re done with the video!
Note: You can also do some fancy stuff like add an intro screen, or music. I do that for most of mine. But let’s keep it simple for now…
7: Create a blog post (or article / whitepaper)
This is the easy part…
Your experts already created the 50-100 word responses…
You already created a highlight quote for each…
And converted them into images…
And you turned those images into a video
Now, just make sure to include these 4 elements:
- Header text for each expert with their name
- Image quote
- Full text
- Bio and link out to more info about them (optional)
Here’s an example of how I did this in my “engaging eLearning” roundup:
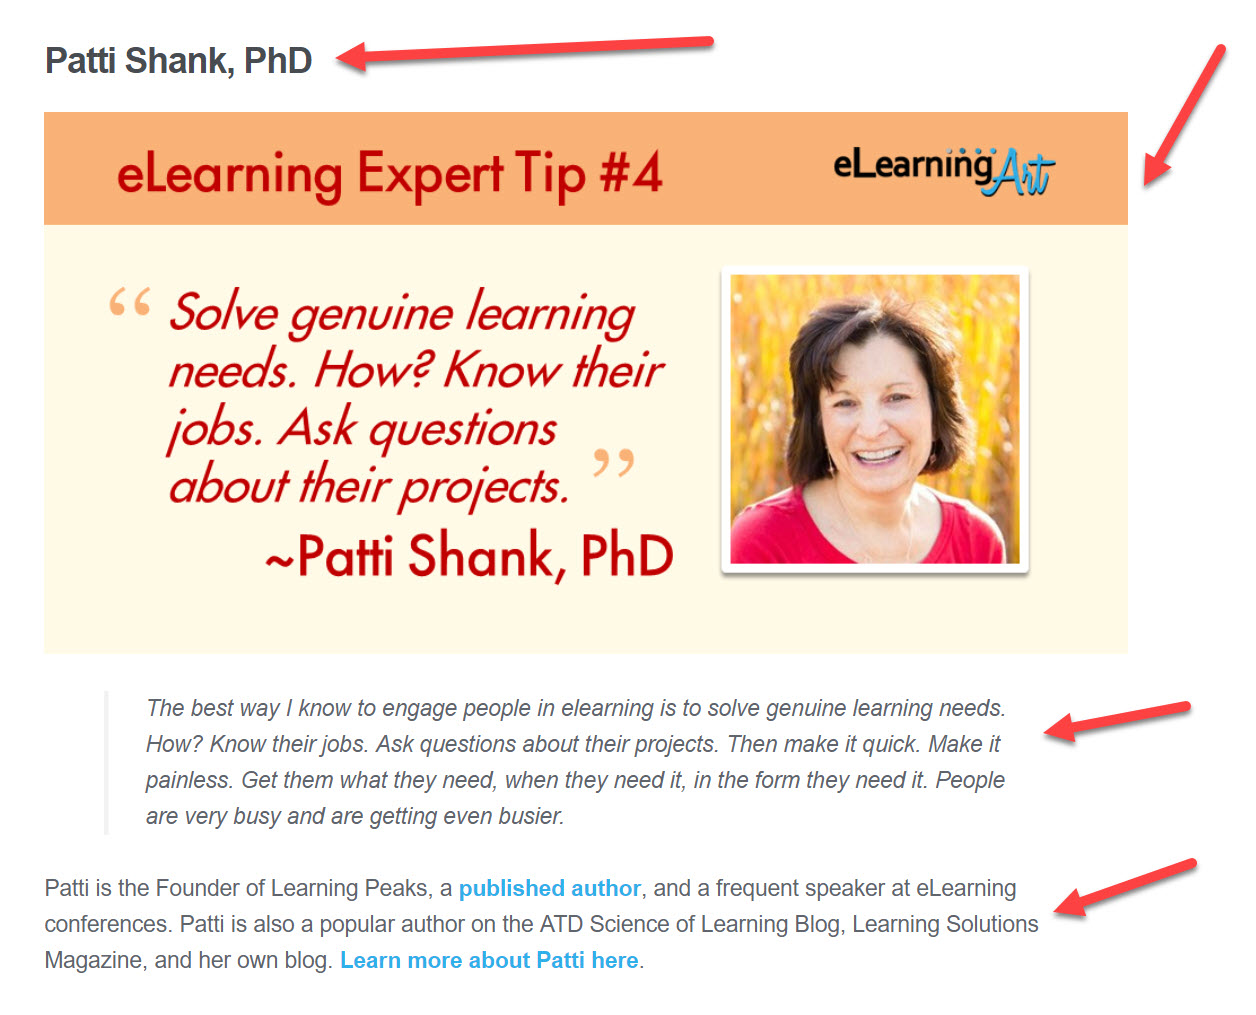
Boom! You now have:
- 10 full responses from experts addressing a single question
- Hightlight quotes in text format
- Highlight quotes in video format
- Highlight quotes in video format
Here’s how those came together into my eLearning trends blog post:
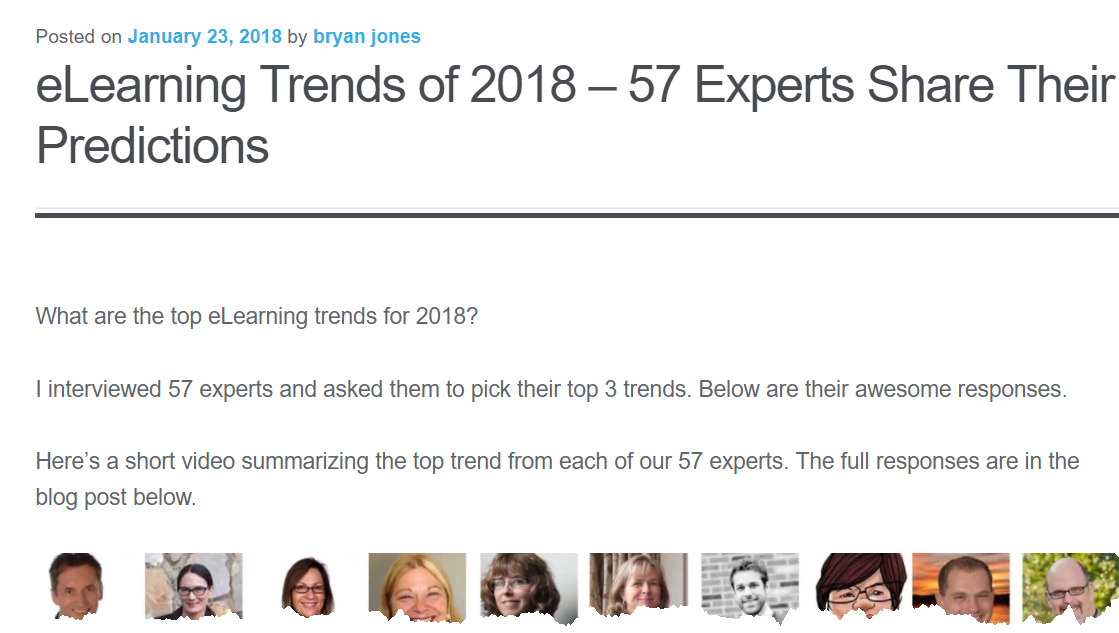
With a video…

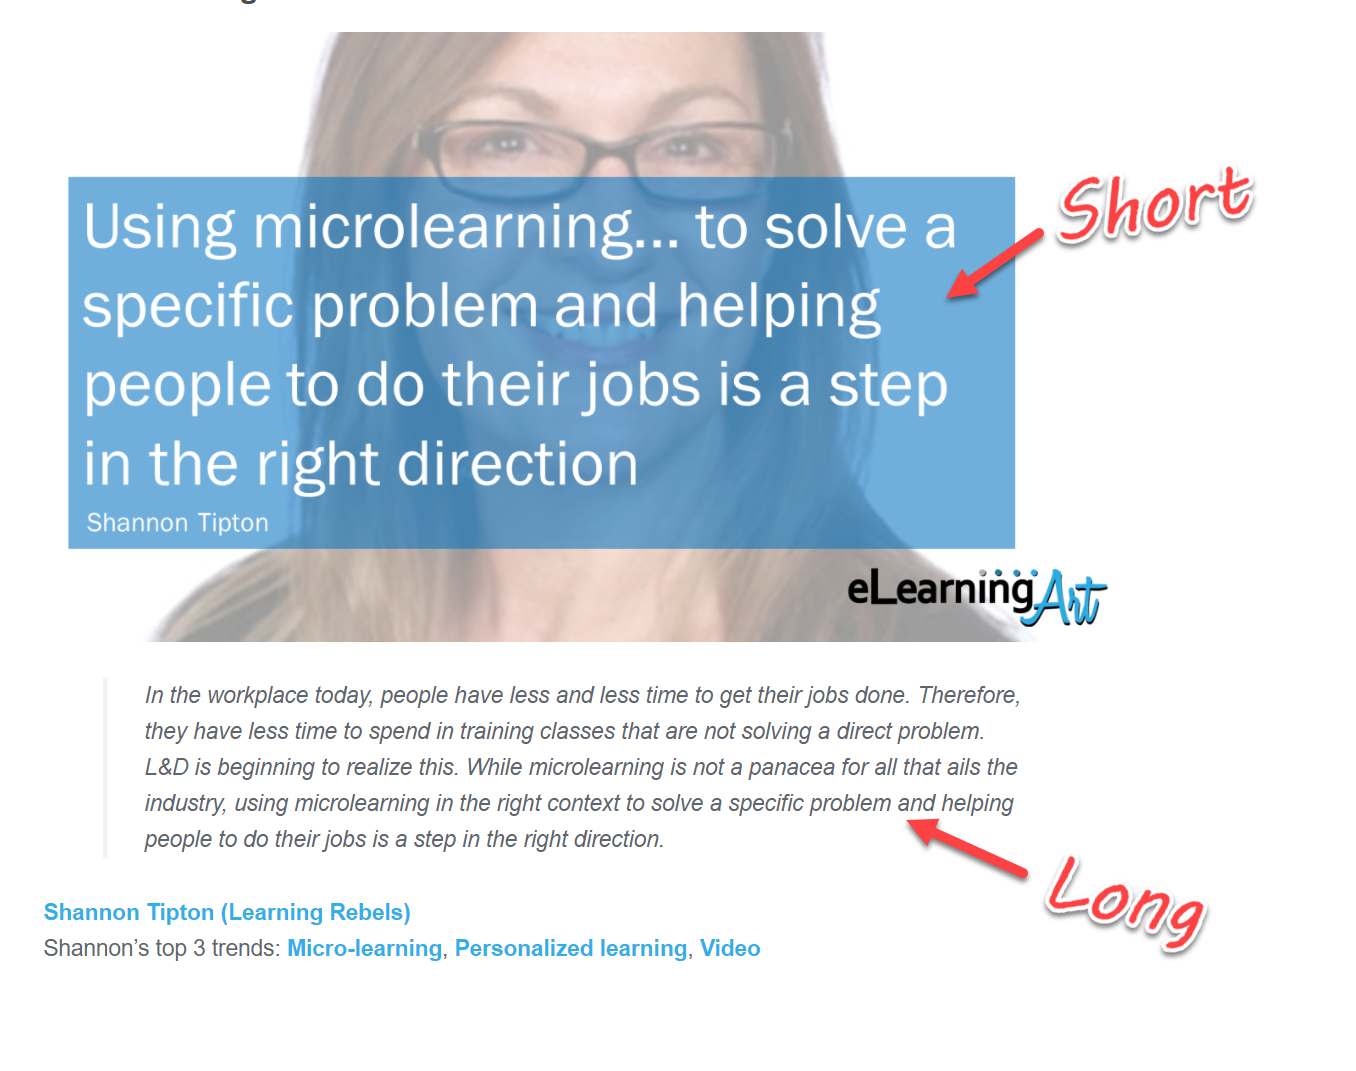
The blog post has abbreviated content quotes (images) and long quotes (text
8: Plan for training delivery
How might you use these? Imagine this flow:
During onboarding you:
- Assign the article as a resource
- Mixed into a course, content, or presentation you embed the tip quotes whenever relevant to reinforce the tips
- After the training, you drip one tip a day/week, etc (and link back to the original article as a resource) for “spaced learning”
- A month after they’ve been onboarded, you send the recap video showing all of the best tips (and link back to the main article
- If the content is popular, look to repurpose it into other formats (see below)
9: Identify other repurposing opportunities
In the 2017 version of the trends roundup, I also included an ebook. I decided not to do it for 2018.

Each expert got a single page the included both the highlight quote and the full text.
My point is this…
There are a lot of options for repurposing the roundup content.
Here’s a quick brainstorm of types of content you could repurpose an expert roundup:
- Resize the images for different social channels (LinkedIn, Twitter, Pinterest, Instagram, etc)
- Use this as a presentation and discuss in person
- Turn the same quote presentation into a SlideShare
- Create a “drip” sequence of emails that go out with an individual tip during onboarding..
- Use the quotes as follow up content after training. Just show the quote, but link back to full response
- Turn it into an ebook
- Expand the content into video interviews
And of course, other types of content will lend themselves to different types of repurposing
- Take a course and create a job aid
- Take a procedure and create an infographic or poster
- Take a video tutorial and turn it into step-by-step screenshot instructions
How did that go for you?
I hope you were able to quickly repurpose some content.

Recent Comments